
It is indicated that 442 million people use Pinterest every month, looking for inspiration, tips, and advice. Most of them have made a purchase based on Pins from brands. These can show how Pinterest could be a gold mine for businesses to drive traffic to their online stores. By utilizing Pinterest, businesses can win the customers’ mind if they do it the right way. One of these ways is to claim their website by Pinterest profile.
This may seem to be an unrelated way to success, but it is proved to be undeniable. Businesses who have claimed their websites on Pinterest, especially online shops like a Shopify store, have grown their perfect audience and have driven quality traffic to their stores. Most importantly, they have achieved the ultimate goal of every business - boosting conversions like signups and sales.
Want to know how to claim your Shopify store on Pinterest? Scroll down to read our detailed step-by-step instructions.
Why should you claim your website on Pinterest?
If you still doubt whether it’s worth claiming a website on Pinterest, we can prove its value. Claiming your website will unlock the following benefits.

Access to Website Analytics
The first and probably most important benefit which claiming your website on Pinterest offers is getting access to its completely free, native tool called Website Analytics. It provides many valuable traffic insights into your visitors’ interaction with your Pins, including impressions, link clicks, saves, or your all-time performance. In case that you have to make a report on a specific time period, Pinterest’s Website Analytics allows you to sort your data by dates.
Make sure that your Pinterest profile is upgraded to a free Business account. Then you have multiple metrics worth measuring to gauge the effectiveness of your content, know what Pins are performing best, and modify your content to keep up with your users’ preferences.
Prompt users with clickable website URL
When you finish claiming your website, your full website link will be conspicuously put at the top of your Pinterest profile with a small globe icon next to it. If your profile is verified by Pinterest, a blue checkmark will appear instead. Besides, the link is accessible, which allows more traffic to your site. Visitors can access your online source of information to learn more about the company and its products or service while reassuring the authenticity.
Gain credibility with Featured logo and Rich Pins
Today’s shoppers tend to rigorously research products before deciding to buy one. These two features allow your Pins to have extra information that shoppers need and provide more context for purchase. By claiming your website, Pinterest will pull metadata from the website that it’s just linked to. Then it’ll add your name and profile picture next to any Pins coming from your domain, counting Pins that are shared by other Pinterest users. Then you can enable Rich Pins to add more information or a call to action button to a particular Pin.
Verifying your website on Pinterest proves that your business is authentic, and Pinterest will help distribute your content to a broader audience. More information adding to your Pins means that Pinners can search your content via more keywords. The attached profile pictures and website name can help spread your brand awareness. The overall look of your business will be more professional and credible.
Promote your Pins with Pinterest Ads
Pinterest Ads are normal Pins that businesses pay to display where Pinners are most likely to see them, i.e., home feed, category feeds, and relevant search results.
Most people who browse Pinterest every day are in active discovery mode. They take advantage of the app to decide what to do, make, and buy. They are very willing to embrace new ideas and new brands. Using Pinterest Ads helps you reach more shoppers and may eventually entice them into buying from your brands.
Claiming your website allows you to create and run your own ads on Pinterest. Pinterest Ads prove to go beyond spreading brand awareness and generate demand, and increase conversions.
And more to come
Pinterest profiles who verify their website will be the first to try new and upcoming tools and features. Pinterest’s early access pass helps your brands become more unique, and your Pins stand out from the rest.
How to claim your Shopify store on Pinterest?
It is not difficult to claim your Shopify store. You just need to work through a few quick and simple steps. But first, let us walk you through some reminders before getting started.
Before you get started
Like we have mentioned before, make sure your personal Pinterest account is switched to a Business one before linking it to your Shopify store.
A second-level domain name (e.g., yourcompany.com), a subdomain (e.g., blog.yourcompany.com), or a sub-path domain (e.g., yourcompany.com/en) is required to be able to claim your website by Pinterest account.
To verify your Shopify store, you have to disable your store’s password protection (if you have one). In case you don’t yet want to make your store public, you can temporarily remove password protection and enable it again after claiming your website.
Ways to claim a website by Pinterest account
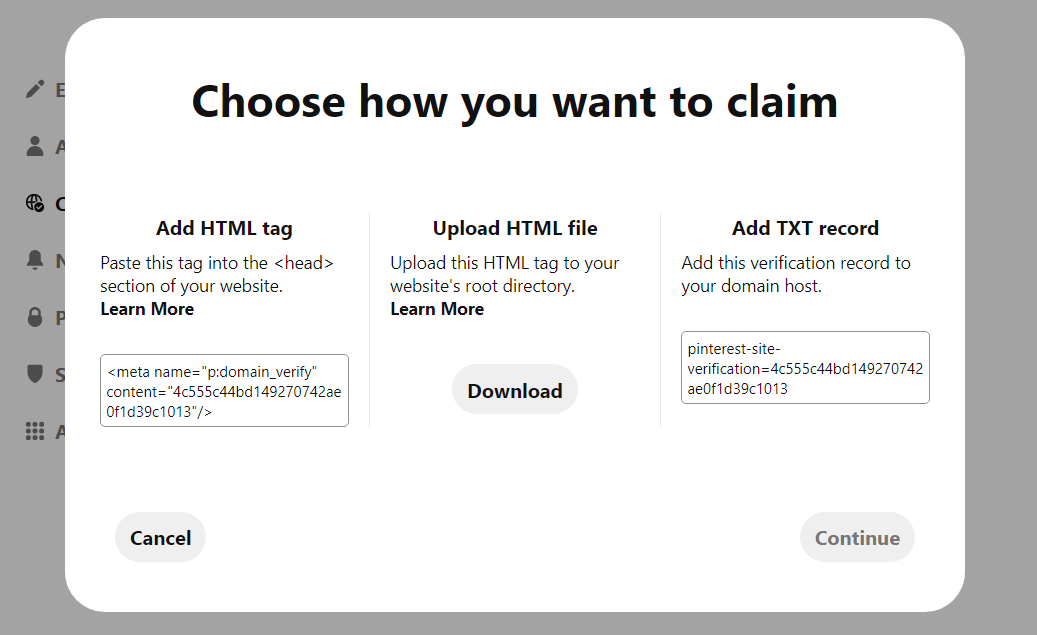
There are three ways to claim a website on Pinterest: adding an HTML meta tag, uploading an HTML file, and adding a TXT record to your domain host. In this tutorial, I will show you the easiest and quickest way - adding an HTML tag since I know not all of us are techies.

What is an HTML Tag?
An HTML tag is a piece of text, i.e., hidden keywords, within a web page that describes how your web browser must format and display the content. The reason for adding a meta tag to the source code of your website is to confirm that you are the owner of the website you are claiming.
How to claim your Shopify online store on Pinterest by adding an HTML Tag?
Step 1: Copy the HTML tag
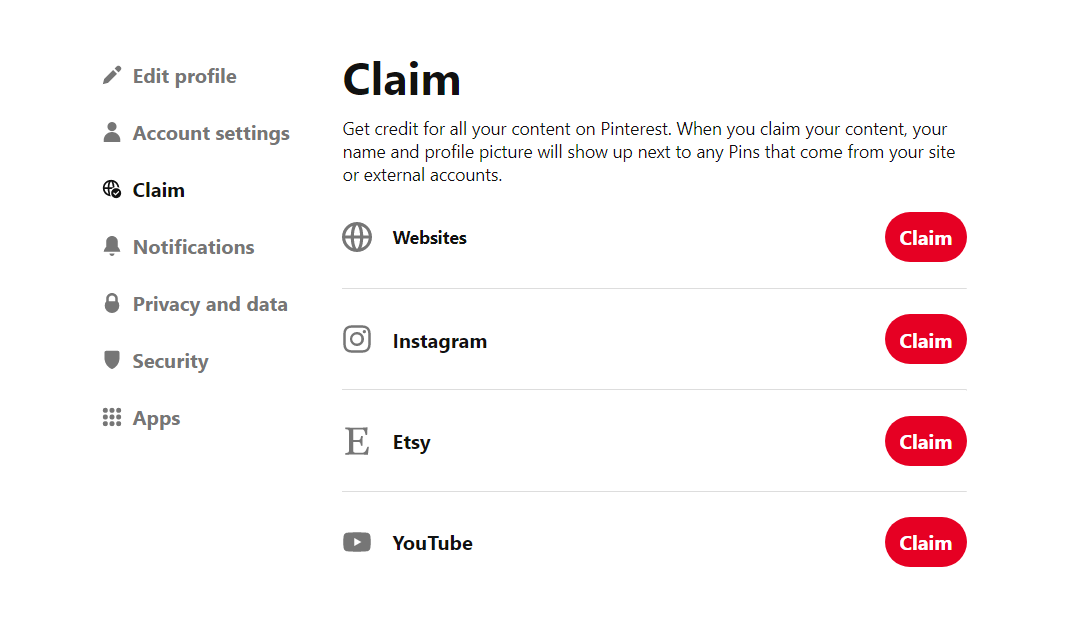
- Log into your Pinterest business account and click on the chevron down icon in the top right corner, next to your profile picture.
- When the dropdown menu shows up, navigate to the settings section by selecting “Settings.” Then click Claim with a little globe icon from the navigation bar on the left and continue clicking the red “Claim” button next to the Websites option.
- Now a pop-up window appears asking how you would like to claim your website. Just click on the box containing the tag in the Add HTML tag section to copy it.
Step 2: Adding the HTML tag to your website
After copying the meta tag, head to your Shopify store and add it to the section of the website. You can complete this step on both your PC and Mobile devices.
Desktop:
- Log in to your Shopify account and go to Shopify admin. Then access the “Online Store” section and select “Themes”.
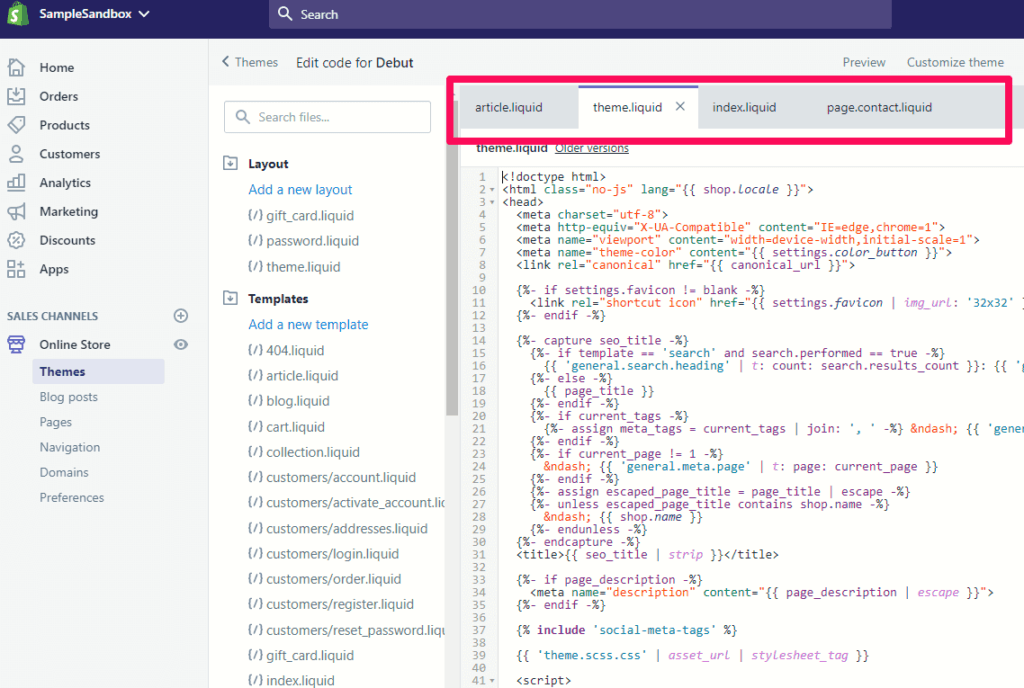
- In Themes, find the theme you want to edit, then click Actions and choose Edit code. This will launch the theme file editor where you find the Layout segment.
- In the Layout segment, choose the theme.liquid file to open it in a new tab within the editor.
- Then paste the HTML tag that you just copied on a blank line right below the opening tag. After pasting the code, click Save.
Mobile devices:
- If you are claiming your website on Shopify Android and iOS app, first tap the Store icon on the bottom right corner.
- In the Sales channels section, tap Online Store and then Manage themes.
- The following steps will be the same as the Desktop tutorial. Choose the theme you want to edit, then click Actions and choose Edit code.
- In the Layout segment, choose the theme.liquid file to open it in a new tab within the editor.
- Then paste the HTML tag that you just copied on a blank line right below the opening tag. After pasting the code, click Save.
Step 3: Finish claiming on Pinterest
- After pasting and saving the meta tag, exit the theme.liquid setting and go back to the previous Pinterest tab.
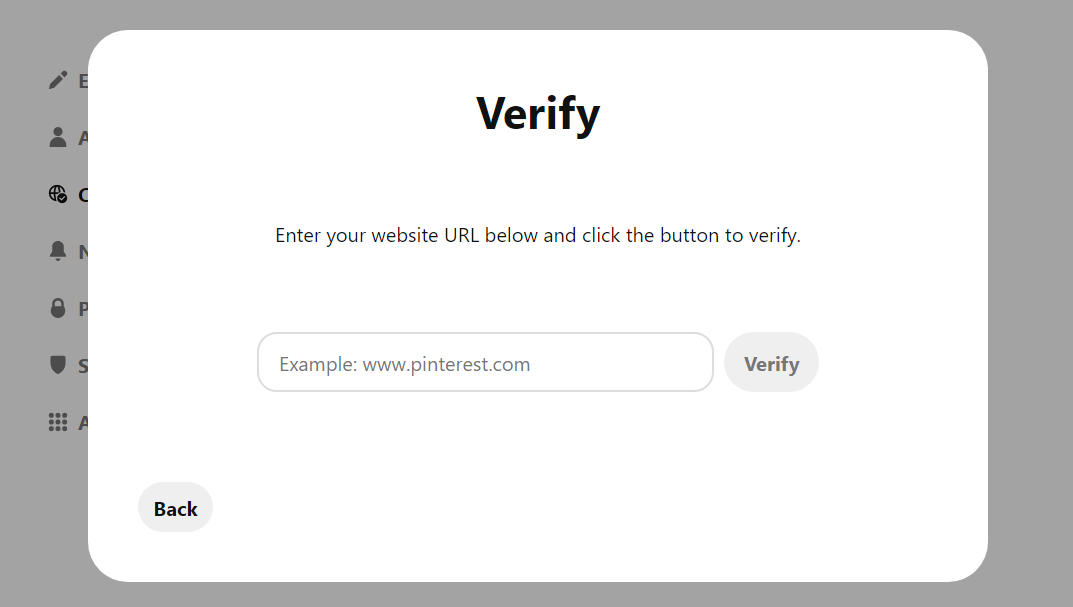
- Click the red Continue button in the pop-up window. Here you need to enter your website URL into the box and click the button to verify.
Now you have finished your job, and the rest will be on Pinterest. It will automatically check for the HTML tag and claim your website. If you did it right, a small globe icon would be added next to your website URL on your Pinterest profile. You also get notified via email after a couple of minutes. Once the claiming progress is over, you can remove the HTML tag from your website’s source code and enable your Shopify store’s password protection (if you want).
Conclusion
Claiming your Shopify store on Pinterest is quick and straightforward, but the benefits are significant. We hope that you learned and succeeded in claiming your store from our articles. Now enjoy the extra features that Pinterest offers and figure out the way to improve your social presence and credibility of your brand from these.

